How to Meet foto passaporto italiano and ID Requirements in 2026
Picture the moment at the Questura in Italy: you have waited three months for your appointment, handed over a thick folder of application documents, and the processing officer scans your identity photograph. A red light flashes on their terminal, and your application is immediately halted because the background in the image is slightly off-white instead of pure white. This is the reality of Italian biometric document processing. Securing a valid foto passaporto italiano requires meeting strict International Civil Aviation Organization (ICAO) standards that Italian authorities enforce without exception through automated digital scanners.
Automated systems do not evaluate how you look; they measure precise geometric distances between your facial features and verify background contrast. Whether you are renewing a passport for an adult or applying for a newborn’s first travel document, understanding the mechanical requirements of the scanning software is the only way to avoid application delays.
Quick Summary
Securing valid Italian identification documents requires submitting biometric photographs that pass automated digital verification at the Questura or local Comune. A compliant image must feature a plain white background, even diffuse lighting without facial shadows, and specific dimensional framing that biometric algorithms can measure.
- The standard image size is strictly 35mm wide by 45mm high.
- Digital verification software rejects images with visible background shadows or uneven lighting.
- Infants must be photographed lying down without visible support hands or objects in the frame.
- Different Italian documents, from passports to electronic ID cards, share these identical biometric base requirements.
Table of Contents
- Why Your foto passaporto italiano Triggers Verification Failures
- 1. Mapping the Exact Dimensions
- 2. Calibrating Lighting for Biometric Scanners
- 3. Formatting the Residence Permit Print
- 4. Preparing the Digital Identity Card File
- 5. Positioning Infants for Biometric Capture
- Common Pitfalls & Troubleshooting
- FAQ
- Recommended Reads
Why Your foto passaporto italiano Triggers Verification Failures
Italian immigration and civil registry offices no longer rely on the naked eye to determine if an identity photograph is acceptable. When you hand over your photograph at the Questura, the officer feeds it into a specialized biometric scanner connected to the national registry. This software maps a geometric grid over your face, measuring the exact distance between your pupils, the tip of your nose, and the base of your chin.
Rejections happen because the automated system cannot complete this geometric map. If your head is tilted by even three degrees, the algorithm registers the distance between your eyes as asymmetrical. If a shadow falls across your jawline, the software interprets that darkness as a physical void and fails to find the edge of your face.
The technical rigor applied to Italian documents aligns closely with global regulations, mirroring the strict facial recognition algorithms used in United States baby passport photo specifications. Understanding that your image will be read by a machine, rather than a human, changes how you must prepare it. Every variable from background texture to file compression must be managed to ensure the automated systems can extract the necessary data.
1. Mapping the Exact Dimensions
Precision Sizing Prevents Automated Rejections
Slide a ruler against the final print, and the geometry leaves no room for debate: the image must measure exactly 35 millimeters in width and 45 millimeters in height. Within this rigid frame, the subject's face must occupy a specific volume. From the base of the chin to the crown of the head (excluding hair), the face must measure between 32mm and 36mm, dominating the vertical layout while preserving a distinct margin of empty space above the head.
The mechanical necessity behind this rule dictates how you should frame the shot. Biometric scanners need clear negative space around the head to calibrate the borders of the image. The algorithm searches for the contrast line between the top of the subject's head and the white background; if the crop cuts into the hair or rests directly on the skull line, the software registers an incomplete head geometry and halts the scan.
The mistake applicants make is attempting to crop the image too tightly while taking the photograph. By filling the camera frame with the face, they leave no buffer zone. When the image is later printed or converted to the exact 35x45mm ratio, the face exceeds the 36mm maximum height limit. The mandatory fix is to shoot the original photograph wide. Capture the subject's entire torso and ample empty space above their head. This provides the necessary digital material to crop the image down to the precise millimeter requirements later without compromising the head-to-frame ratio.
2. Calibrating Lighting for Biometric Scanners
Shadows on the Background Read as Physical Obstructions
Meeting the italian passport photo specifications requires mastering diffuse lighting. The biometric algorithm relies entirely on even contrast to measure facial depth. It expects the brightest parts of the image to be the bridge of the nose and the forehead, and it calculates the shape of the face based on the subtle, symmetrical gradients falling away toward the ears.
When lighting is uneven, the system's depth perception breaks. A common household ceiling light casts deep shadows inside the eye sockets and under the nose. To the scanner, these dark patches read as anomalous facial structures. More critically, directional light casts a harsh shadow on the background behind the subject's neck. The software cannot distinguish a background shadow from an physical object, resulting in an immediate rejection for a "non-uniform background."
The mistake people make is relying on a camera's built-in flash to brighten a room. A flash flattens the facial features, eliminating the micro-contrast the algorithm needs, while simultaneously throwing a dense, sharp shadow onto the wall behind the subject. The only reliable mechanism for achieving biometric compliance at home is diffuse, indirect daylight. Position the subject facing a large window on an overcast day, turning off all artificial lights in the room to prevent mixed color temperatures. The window light wraps evenly around the face, eliminating under-eye shadows and leaving the background perfectly uniform.
3. Formatting the Residence Permit Print
Paper Quality Determines the Scanner's Success
A foto per permesso di soggiorno (residence permit photo) shares the exact biometric dimensions of a passport photo, but it involves a distinct physical submission process. Expatriates typically submit this photograph as part of the "Kit Giallo" at the local Poste Italiane office before their main appointment at the immigration office. During this intake, the postal worker runs the physical printed photograph through an optical feed scanner.
The physical medium of the photograph is just as critical as the image itself. The scanner uses a high-intensity light bar to read the image. If the photograph is printed on thin paper, the light bleeds through the material, capturing the texture of the paper and any text printed on the back. The resulting digital file sent to the immigration database is heavily distorted, leading to a rejection weeks later.
Printing biometric images on standard A4 paper using a home inkjet printer is a guaranteed path to rejection. Inkjet printers lay down a matrix of microscopic dots; when passed through the Post Office scanner, this dot matrix creates a moiré pattern that obliterates the sharp edges of the facial geometry. A compliant residence permit photo must be printed on high-quality, continuous-tone photographic paper (minimum 250gsm). You must use thermal dye sublimation printing, which is standard at commercial pharmacy kiosks, or traditional silver halide photo printing to ensure the image survives the physical scanning process.
4. Preparing the Digital Identity Card File
Compression Artifacts Destroy Biometric Data
The process for acquiring a foto per carta d'identità elettronica (CIE) differs significantly from paper-based applications. The CIE is issued by your local Comune (municipality), and the registry office allows applicants to bring their biometric photograph as a digital file on a standard USB flash drive. This eliminates the degradation caused by physical scanners, but introduces strict digital file requirements.
The Comune's software requires the digital file to be in JPEG format, with a file size strictly under 500KB, and a minimum resolution of 400 dots per inch (dpi). The digital terminal directly uploads this file to the Ministry of the Interior's servers. If the resolution falls below 400 dpi, the algorithm cannot isolate the precise edge of the iris, failing the eye-spacing check.
The mistake applicants make is capturing a pristine, high-resolution photo on their smartphone, and then emailing it to themselves or sending it via WhatsApp to transfer it to a computer. Messaging apps apply aggressive compression algorithms to save bandwidth, drastically reducing the dpi and stripping the EXIF metadata that the government software uses to verify the file format. This leaves you at the Comune desk with a file the system refuses to read. Always transfer the original, uncompressed file directly via a physical cable from your camera or phone to the computer before loading it onto the USB drive. You can verify how other nations handle similar digital ID constraints by checking the United Kingdom baby passport photo regulations.
5. Positioning Infants for Biometric Capture
Fabric Wrinkles Register as Foreign Objects
Photographing a newborn for an Italian passport is structurally different from photographing an adult. The biometric standards do not relax for infants; the background must still be plain white, the lighting even, and the facial proportions exact. However, infants cannot support their own necks and cannot follow instructions to look at a lens.
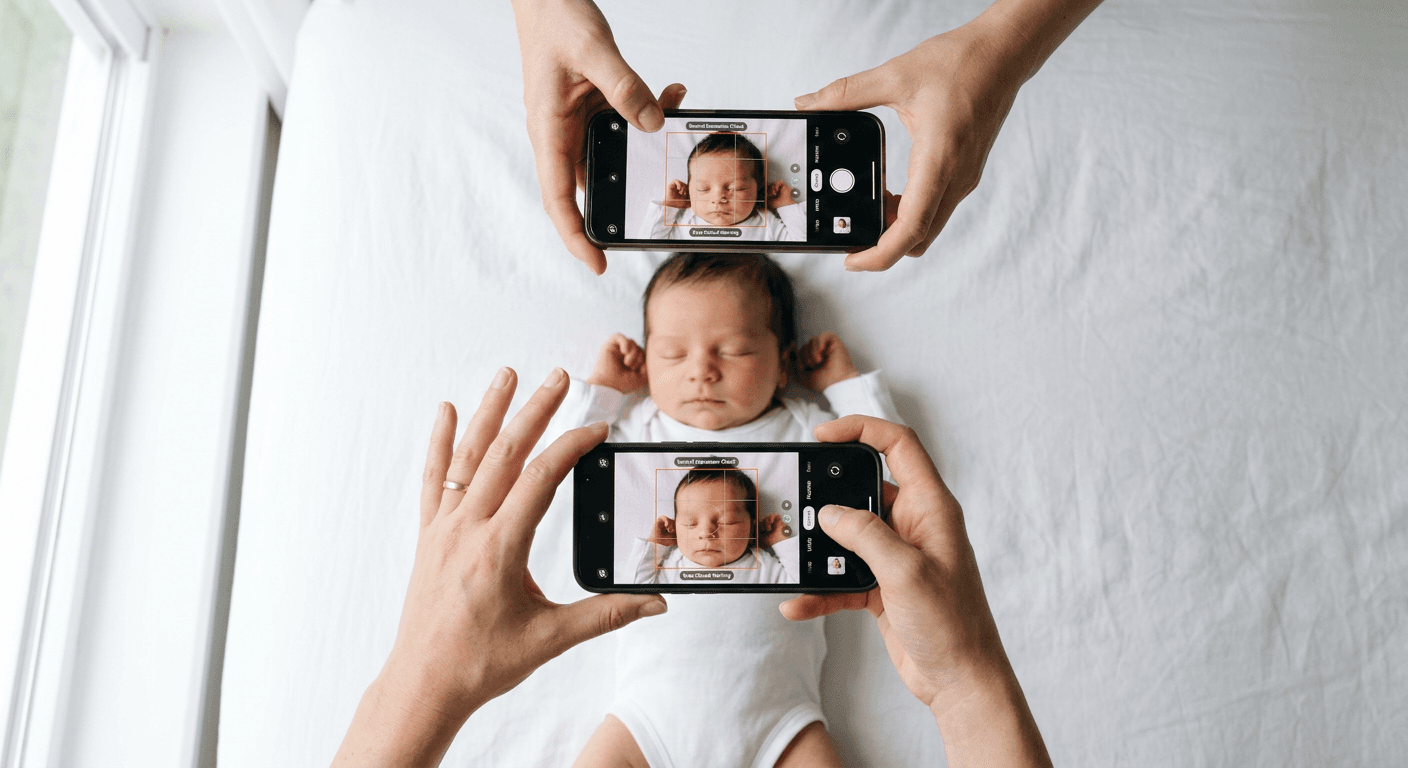
The mechanical challenge is keeping the background perfectly uniform without introducing structural support into the frame. The facial recognition software is programmed to reject any image containing "other objects or persons." If a parent's fingers are visible supporting the baby's shoulders, or if a pacifier is in the frame, the scan fails automatically.
Practical rule: Never try to hold an infant upright for a biometric photo; lay them flat on a bright white sheet placed over a rigid floor in a room flooded with indirect daylight.
The mistake parents make is placing the white sheet over a soft couch or mattress. When the baby's weight presses into the soft surface, the sheet bunches and creates deep wrinkles around their head. The scanner's algorithm interprets these dark shadows in the wrinkles as foreign objects in the background. By placing the sheet over a rigid surface like the floor, the fabric remains taut and flat, satisfying the requirement for a uniform, textureless background. If the process proves difficult, a platform designed to generate infant passport photos online can algorithmically remove minor background imperfections.
Common Pitfalls & Troubleshooting
Biometric rejections rarely come with clear explanations. Understanding the mechanical cause behind the symptom allows you to apply the correct fix rather than guessing at a solution.
Symptom: The Questura officer states the image has "low contrast" or is "too dark," even though the photo looks perfectly clear to the naked eye. Real Cause: The photo was taken under mixed lighting (e.g., sunlight from a window mixed with an LED room light). The conflicting color temperatures confuse the scanner's contrast mapping. Fix: Reshoot the image using only one light source. Turn off all artificial lights and rely entirely on indirect daylight.
Symptom: The physical print is rejected for "glare" on the face or background. Real Cause: Using glossy photo paper instead of matte. Glossy paper reflects the optical scanner's intense light bar directly back into the lens, blowing out the highlights on the subject's forehead or cheeks. Fix: Reprint the digital file exclusively on high-quality matte or semi-matte photographic paper. If you used a service with a 100% refund policy on rejected photos, you can reformat the digital template and print it again at a kiosk.
Symptom: The software rejects the image for "incorrect proportions" despite the paper being exactly 35x45mm. Real Cause: The face itself was cropped too large within the frame. The chin-to-crown measurement exceeds 36mm, leaving insufficient white space around the head for the algorithm to measure the borders. Fix: Return to the original, uncropped digital image. Recalculate the crop, ensuring the head occupies the dominant central area while leaving enough clear margin at the top and bottom before cutting the physical 35x45mm borders.
Symptom: A newborn's photo is flagged for "closed eyes." Real Cause: Unlike some jurisdictions that allow sleeping newborns, Italian authorities strictly mandate that the subject's eyes must be open and clearly visible to map the iris placement. Fix: Wait for the infant's most alert period, typically right after feeding. Keep the camera ready overhead and use a noise-making toy near the camera lens to trigger a momentary upward glance.
FAQ
Can I wear prescription glasses in an Italian ID photo? Italian specifications technically permit glasses if the frames do not obscure any part of the eyes and there is absolutely no glare on the lenses. However, biometric scanners frequently misinterpret thick frames as facial obstructions or flag lens reflections as eye deformities. The safest and most practical approach is to remove your glasses entirely for the photograph.
Are the photo requirements different for a residence permit versus a passport? No. Whether you are applying for a passport, a residence permit, or a digital ID card, the underlying biometric requirements are identical. The only variance is in how you deliver the file - either as a physical matte print or a formatted digital JPEG.
How recent must the photograph be? Italian authorities strictly mandate that the photograph must have been taken within the last six months. If you submit a photograph that matches a previous passport or an older visa in their system, the software will flag the duplicate, and the officer will reject your application for using an outdated image.
What if my infant's ears are not visible? While adult subjects should ensure their hair does not obscure their face, the algorithm primarily relies on the eyes, nose, and chin for geometric mapping. For infants, as long as the head is facing directly forward and the chin-to-crown ratio is correct, obscured ears will not trigger an automated rejection. You can consult a help center for passport photo specifications for nuanced examples of infant framing.