How to Master Come Fare Una Foto Formato Tessera at Home with Your Smartphone
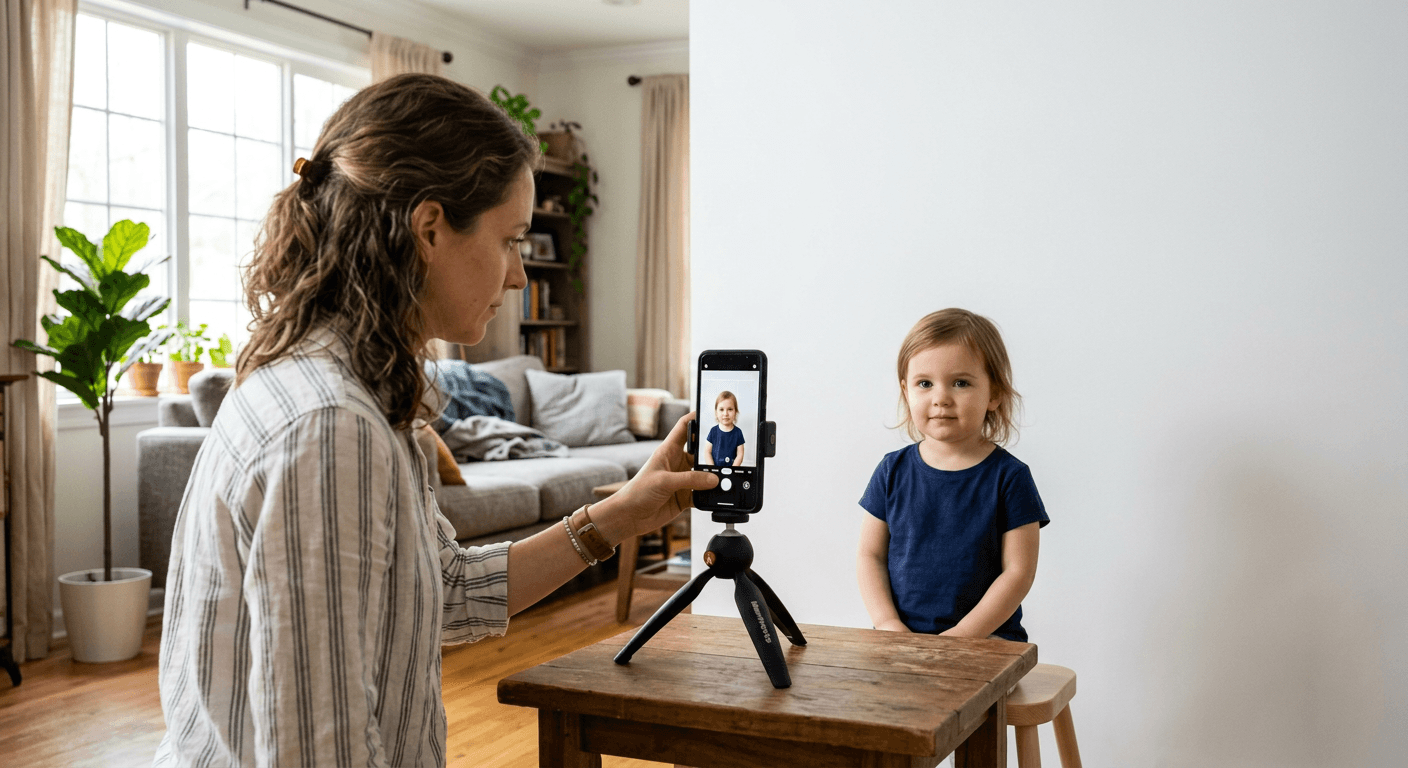
A parent stands in a brightly lit hallway, balancing a crying toddler in one arm while trying to steady a smartphone with the other. They are trying to figure out come fare una foto formato tessera at home without spending hours in a traditional photo booth or commercial studio. Generating government-compliant ID photos from a smartphone is entirely possible, but success depends on precise physical setup rather than digital corrections. Most applications are rejected not because of the camera's resolution, but due to incorrect positioning, poor lighting, or background shadows. Understanding the exact mechanical requirements makes the process straightforward.
Quick Summary
Creating a government-compliant ID or passport photo at home requires capturing a high-resolution, shadow-free image against a neutral background and formatting it to precise biometric specifications. By using a smartphone and following strict physical alignment and lighting standards, you can produce official-grade documents without professional studio equipment.
- Lighting: Position the subject facing a natural light source to eliminate facial shadows.
- Positioning: Keep the camera at eye level, exactly 1.2 to 1.5 meters away from the subject.
- Expression: Maintain a neutral facial expression with eyes open and mouth completely closed.
- Verification: Use automated tools to verify pixel dimensions and background color compliance.
Table of Contents
- Quick Summary
- Why physical camera settings outperform post-processing software
- 1. Setting Up the Lighting and Environment
- 2. Positioning and Camera Alignment
- 3. Managing the Background and Camera Settings
- 4. Capturing the Shot and Expressions
- 5. Editing and Formatting to Government Specifications
- Country-specific biometric rules you cannot afford to ignore
- Common Pitfalls & Troubleshooting
- FAQ
- Recommended Reads
Why physical camera settings outperform post-processing software
When trying to capture high-quality passport photos, many people rely too heavily on software to fix errors made during shooting. They assume that heavy editing, digital filters, or automatic background erasers can turn a poorly lit, angled selfie into a compliant ID image. This is a mistake. Biometric verification systems used by passport agencies scan for natural light gradients, smooth edges around the hair, and unaltered facial geometry.
If you use a basic smartphone automatic background remover, it often creates jagged or artificially feathered edges around the hair and ears. Scanners flag these artificial edges as manipulation, leading to immediate rejection. Similarly, relying on digital zoom rather than physical distance introduces pixelation, reducing the clarity of key facial features like the irises and nostrils. Focus on the physics of the shot - lighting, distance, and angle - before pressing the shutter button. Software should only be used for precise cropping and minor exposure normalization, not for repairing fundamental photographic mistakes.
1. Setting Up the Lighting and Environment
Natural light from a window prevents harsh facial shadows
The primary factor that determines whether an ID photo passes biometric scanning is the distribution of light across the face. Shadow is the most common cause of rejection. Biometric systems map facial coordinates by reading light and shadow contrasts; uneven shading across the nose bridge or under the eye sockets prevents the system from accurately measuring facial proportions.
To achieve balanced illumination, place the subject directly facing a large window during daylight hours. Natural, indirect daylight is highly diffused, meaning it wraps around facial features smoothly without creating sharp lines. Avoid direct, harsh sunlight, which forces the subject to squint and creates deep shadows under the nose and chin. If natural daylight is unavailable, place two matching lamps with diffuse white bulbs symmetrically at a 45-degree angle in front of the subject, slightly above their eye level. Never use the camera's built-in flash, which flattens facial features and projects dark shadows onto the background.
2. Positioning and Camera Alignment
Eye level shooting eliminates perspective distortion
Correct positioning prevents perspective distortion, which occurs when the camera lens is too close or angled improperly. Many users search for come fare foto passaporto because they are unsure of how to align the camera. The camera must be held perfectly level with the subject’s eyes. Tilting the phone upward elongates the chin and hides the top of the head, while tilting it downward distorts the forehead.
Maintain a physical distance of 1.2 to 1.5 meters (4 to 5 feet) between the lens and the subject. Standing closer than 1 meter forces the wide-angle lens of your smartphone to distort facial features, causing the nose and forehead to look wider than they actually are. To keep the frame stable, use a tripod or have a second person take the photo. Selfies are universally rejected because the arm’s angle tilts the shoulders and places the camera too close, causing noticeable distortion.
3. Managing the Background and Camera Settings
Plain backgrounds must be captured without digital filters
Getting the background right is a major challenge for home photographers, prompting queries like foto per passaporto dove farle to find reliable options. In reality, you can easily create a professional background at home using a flat, light-colored wall. The background must be solid white, off-white, or light gray, with no patterns, wood grain, or decorations visible.
To minimize shadows, have the subject stand approximately 30 to 50 centimeters (1 to 1.5 feet) away from the wall. This physical separation allows any light that passes the subject to disperse, preventing a dark shadow from forming behind the head. Disable "Portrait Mode" entirely; its software-driven background blurring cannot distinguish between the fine edges of hair and the background, resulting in blurred physical features. Keep the resolution at its highest setting, turn off beauty filters, and set the aspect ratio to standard 4:3.
Practical rule: Always stand at least one foot away from the background wall to prevent your body's shadow from showing up behind your head.
4. Capturing the Shot and Expressions
Neutral expressions are required for biometric passport compliance
Biometric passports require a completely neutral facial expression to ensure that computerized facial recognition systems can match the passport photo with the traveler's face at automated border gates. When you creare foto tessera at home, you must ensure the subject is not smiling, frowning, raising their eyebrows, or squinting. The mouth must be closed, and the eyes must be open and looking directly into the camera lens.
This requirement is particularly difficult when dealing with infants or toddlers. For children, use the "burst mode" on your smartphone. Hold down the shutter button to take 10 to 20 images in rapid succession. This increases the chances of capturing that split second when the child is looking forward with a closed mouth and open eyes. Avoid using toys, pacifiers, or hands to hold the child's head in place. Any foreign object visible in the frame will cause immediate rejection.
5. Editing and Formatting to Government Specifications
Manual cropping often fails precise official millimeter guidelines
Once you have captured a sharp, well-lit photograph, you must format it to the precise dimensional standards of the target country. Different jurisdictions have vastly different requirements for overall dimensions and head-to-frame ratios.
For example, European Union countries require a standard 35x45 mm size where the head must occupy 70% to 80% of the vertical space. Conversely, the United States requires a 2x2 inch square format where the head must be precisely centered and measure between 1 and 1.375 inches from the bottom of the chin to the top of the hair. Attempting to crop these photos manually on a phone using standard editing sliders almost always results in a head size that is too large or too small. To avoid rejection, use specialized software designed to automatically scale, center, and verify the alignment of the face.
Country-specific biometric rules you cannot afford to ignore
When preparing documents for international travel, you must understand that there is no single "universal" passport photo standard. Every sovereign nation defines its own dimensions, background colors, and acceptable facial tolerances. Applying with the wrong specifications will guarantee a delayed application and extra processing fees.
If you are submitting documents in North America, you will need to follow the strict United States Baby Passport Photo Guide which requires a square 2x2 inch crop. In contrast, European applications require a rectangular format, as detailed in our comprehensive Germany Baby Passport Photo Guide. While Germany and most Schengen zone countries demand a solid, neutral gray background, other countries might allow off-white or light blue.
Understanding these minor differences is the line between an approved document and a rejected one. Before finalizing your image, consult official government databases or a reliable template generator to ensure every pixel matches the legal specifications of your target country.
Common Pitfalls & Troubleshooting
Even when following a step-by-step guide, subtle errors can slip into your home photoshoot. These mistakes often look identical from the outside - resulting in a generic "rejected photo" notice from the government - but they stem from entirely different mechanical causes. Here is how to diagnose and fix them.
The "Halo" or shadow ring around the head
- Symptom: A dark, fuzzy outline or a bright glow frames the subject's hair and shoulders on the background.
- The Cause: This is caused by standing too close to the background wall, which projects a harsh shadow, or by using automated AI background removal software that struggles to blend the fine edges of your hair with the new white canvas.
- The Fix: Physically move the subject 50 centimeters away from the wall to let light disperse. If editing, avoid aggressive automated cutout tools; instead, use biometric software that retains natural hair transitions or take the photo against a wall that is already the correct color.
Red-eye and pupil reflections
- Symptom: The subject's pupils appear red, hazy, or have a large white dot directly over the iris.
- The Cause: This is a direct consequence of using the smartphone's built-in camera flash. The flash light reflects off the back of the retina or reflects intensely off the cornea, masking the natural color of the eyes.
- The Fix: Disable the camera flash entirely in your smartphone settings. Rely solely on passive window light or external diffused household lamps positioned to the sides of the camera.
The "slanted shoulder" perspective rejection
- Symptom: The face is clear, but the shoulders are uneven, or one side of the face appears larger than the other.
- The Cause: This happens when taking a selfie or when the photographer is standing too close and shooting at an angle, forcing the subject to turn slightly to look at the lens.
- The Fix: The photographer must stand at least 1.2 meters away and use a tripod or stable support. Ensure the subject's chest and shoulders are squared directly toward the lens, keeping the camera perpendicular to the face.
Glare and reflection on eyeglasses
- Symptom: A bright white glare covers the eyes, or the frame of the glasses obscures the pupils.
- The Cause: Light from windows or overhead lamps is bouncing directly off the glass lenses into the smartphone camera.
- The Fix: The most reliable solution is to remove the glasses. Many countries, including the US, do not permit glasses in passport photos under any circumstances. If they are allowed and medically necessary, tilt the glasses slightly downward or adjust the angle of the light source to eliminate the reflection.
FAQ
Can I use a selfie for my official passport photo?
No, selfies are almost universally rejected by passport agencies. Taking a selfie forces you to hold the camera too close, which causes wide-angle distortion. Additionally, holding your arm out tilts your shoulders, violating the requirement for a straight-on, level portrait. Always have someone else take the picture or use a tripod with a timer.
What should I wear for a smartphone passport photo?
Wear everyday, casual clothing that contrasts with the background. Since the background must be white or light gray, avoid wearing white, cream, or light pastel shirts, as your shoulders will blend into the background. Do not wear uniforms, hoodies, large hair accessories, or hats.
Is it acceptable to smile in a passport photo?
No. You must maintain a neutral expression with your mouth completely closed and eyes fully open. Smiling changes your facial geometry and makes it difficult for biometric software at border control gates to map key landmarks.
How do I take a compliant passport photo of a newborn baby?
Lay the baby on their back on a plain white sheet or blanket, ensuring there are no shadows on their face. Stand directly over them and shoot looking straight down. Use your camera's burst mode to capture a moment when their eyes are open, their mouth is closed, and they are looking upward. Make sure no hands, toys, or pacifiers are visible in the frame.
Recommended Reads
- Baby Passport Photo Maker - Transform home-captured infant photos into perfectly formatted, government-compliant files within seconds.
- Baby Passport Photo Requirements by Country - Review specific biometric rules, background colors, and millimeter standards for over 100 countries.
- United Kingdom Baby Passport Photo Guide - Learn the specific dimensions, templates, and rules required for UK passport applications.