How to Make a Passport Size Photo Using Your Smartphone
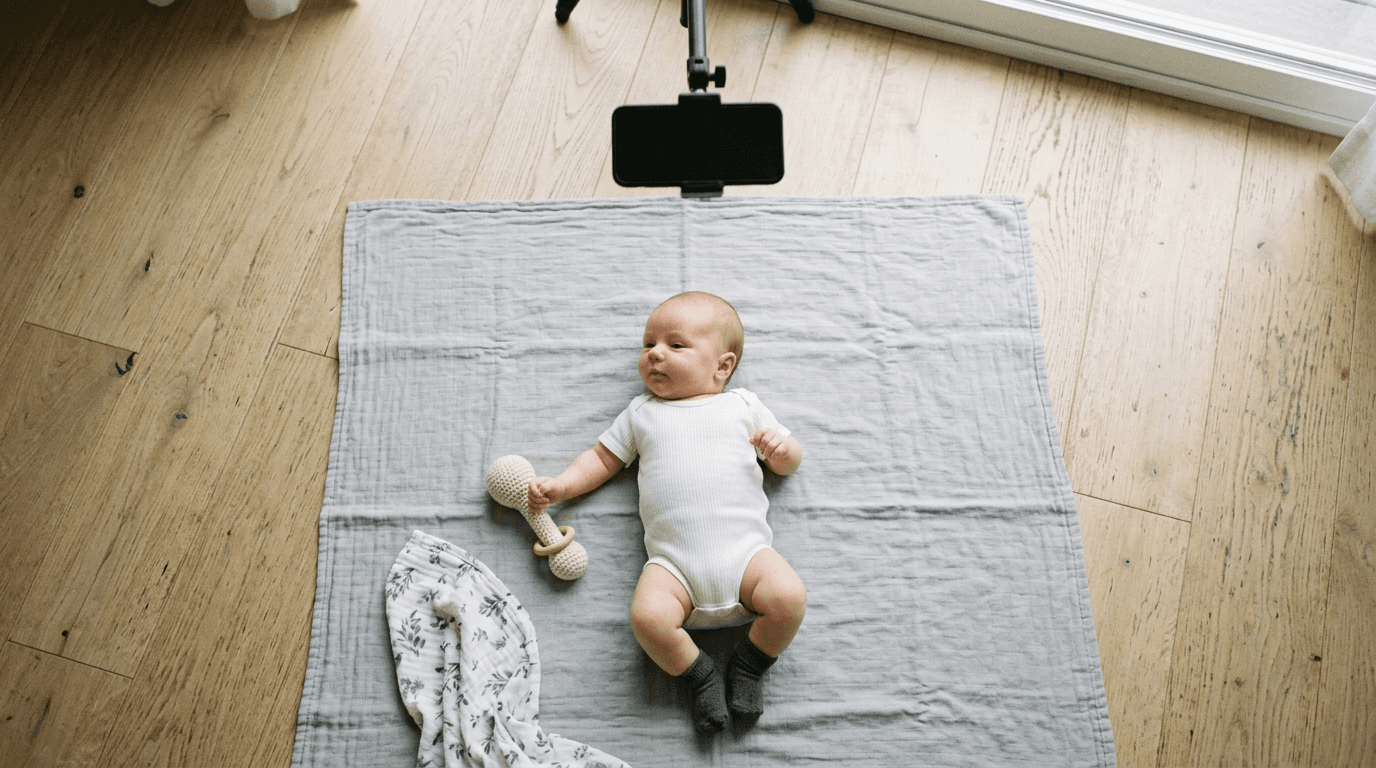
Most parents assume the only way to get a compliant biometric image of an infant is to hold a wriggling child steady under the harsh strobe lights of a pharmacy photo counter. In reality, retail photo systems are designed for adults who can follow verbal instructions, sit upright, and hold a neutral expression. When you try to force an infant into that same workflow, you often end up with an image that gets rejected by passport agencies for uneven lighting, visible hands supporting the neck, or an off-center gaze. Modern smartphone cameras possess sensors capable of capturing government-grade biometric data, provided you control the environment before you tap the shutter.
Quick Summary
Capturing a government-compliant digital passport photo on a smartphone requires controlling ambient light, maintaining a specific focal distance to avoid facial distortion, and applying automated biometric verification.
- Use indirect natural window light to eliminate hard shadows across the face.
- Maintain a minimum distance of four feet from the subject to prevent lens distortion.
- Lay infants on a flat, neutral-colored sheet rather than attempting to sit them upright.
- Rely on biometric software to handle background removal and precise head-size calibration rather than cropping manually.
Table of Contents
- 1. Controlling the Lighting Environment
- 2. Positioning for Proper Biometrics
- 3. Camera Settings and Distance
- 4. Formatting the Digital File
- Common Pitfalls & Troubleshooting
- FAQ
- Recommended Reads
1. Controlling the Lighting Environment
Government agencies reject more photos for shadow patterns than for any other technical failure. A shadow cast across the nose or in the eye sockets prevents automated scanning software from calculating the exact distance between facial features. When figuring out come fare una foto formato tessera, the absolute first step is abandoning artificial room lighting. Overhead bulbs create downward shadows, and mixing warm incandescent light with cool sunlight confuses the camera's white balance.

Finding diffused natural light
Position your subject facing a large window during daylight hours, but avoid direct beams of sunlight. You want the diffused light that fills a room when the sun is on the other side of the building. For infants, lay a plain white or light grey sheet on the floor directly in the path of this window light. The floor placement removes the risk of falling, while the window light provides an even, flat illumination across the face that satisfies biometric requirements.
2. Positioning for Proper Biometrics
Every passport agency demands a clear, unobstructed view of the face from the chin to the crown of the head. For adults, this means sitting straight and dropping the shoulders. For infants who lack neck control, posture dictates the entire setup. If you attempt to hold a baby up, your hands or arms will inevitably appear in the frame, instantly invalidating the shot.
The floor-lay technique
Laying the infant on their back solves the posture problem entirely. The floor supports their neck, keeping the head relatively straight. Stand directly over them to take the photo. Ensure no pacifiers, oversized bows, or textured fabrics obscure the jawline. If you are researching come fare foto passaporto for a newborn, wait until the child is fed and rested. A screaming infant typically closes their eyes or scrunches their facial features, changing the biometric map of their face.
Practical rule: Tap the screen exactly on the subject's eyes before taking the photo to lock both focus and exposure on the most critical biometric markers.
3. Camera Settings and Distance
Smartphone lenses are naturally wide-angle. If you push the phone close to the subject's face to fill the frame, the wide-angle lens stretches the nose and forehead toward the camera, subtly altering the physical proportions of the face. This distortion is invisible to the naked eye but causes verification failures at border control.
Managing focal length
To capture an accurate foto digitale formato tessera, you must back away. Stand at least four to five feet from the subject. At this distance, the optical distortion disappears. Use your camera app's native 2x or 3x optical zoom to frame the shot, or simply take a wider photo and crop it later. Never use portrait mode or any artificial depth-of-field effect. These computational photography modes artificially blur the edges of the hair or ears, confusing the background-removal algorithms used by passport offices.
4. Formatting the Digital File
Once you have a well-lit, undistorted image, it must be formatted to exact governmental specifications. Every country dictates precise millimeter dimensions for the physical print, specific pixel dimensions for digital uploads, and strict ratios for how much of the frame the head must occupy. For instance, you can review the specific dimensional ratios in the United States Baby Passport Photo Guide.
Automated compliance checks
Attempting to manually crop an image to meet a specific proportional head height rule using basic photo editing apps is an exercise in frustration. Instead, rely on specialized biometric tools to creare foto tessera. These systems automatically detect the crown of the head and the bottom of the chin, mathematically scaling the image to fit the exact template required by the destination country. They also replace the background with a pure, uniform color, ensuring compliance even if the underlying sheet had wrinkles.
Common Pitfalls & Troubleshooting
The "Red Eye" Rejection
Symptom: The infant's pupils appear bright red or white, causing immediate rejection. Diagnosis: The smartphone flash fired, reflecting off the retinas. Fix: Never use a flash for biometric photos. Turn the flash setting to "Off" (not "Auto") and move to an area with better natural window light.
The Distorted Head Shape
Symptom: The printed photo makes the subject's nose look unusually large or the ears appear tucked back. Diagnosis: The camera was held too close to the face, utilizing the widest part of the lens. Fix: The most frequent true cause of distortion is proximity. Stand back at least 48 inches and use optical zoom, or take a wider shot and allow compliance software to crop it down.
The Rejected Background
Symptom: An application is returned because the background is "not uniform" or "contains shadows." Diagnosis: Folds in the fabric, carpet textures, or a cast shadow from the person holding the camera interrupted the clean background. Fix: Process the raw image through a dedicated compliance tool that utilizes AI background removal. This strips the physical background entirely and replaces it with the exact hex-code color required by the issuing authority.
FAQ
Can I use a selfie camera for a digital passport photo?
No. Selfie cameras generally have lower resolutions, apply automatic "beauty" filters that smooth out necessary biometric details, and make it nearly impossible to maintain the correct four-foot distance to avoid facial distortion.
Do baby passport photos need the eyes open?
Rules vary by jurisdiction. Many countries allow newborns and infants under six months to have their eyes closed or partially open, recognizing the difficulty of timing the shot. Check the specific regulations for your country.
How do I know if the head size is correct before printing?
Do not guess using a ruler on a screen. Use biometric software that maps the chin and crown, applying the exact country-specific ratio (e.g., the face taking up the designated majority of the total image height).
Can someone else's hands be in the infant photo?
Absolutely not. No part of a parent or guardian may be visible in the frame, including hands supporting the child's neck or shoulders. Laying the child flat eliminates the need for support.