How to Capture a Compliant Foto Passaporto Neonato at Home
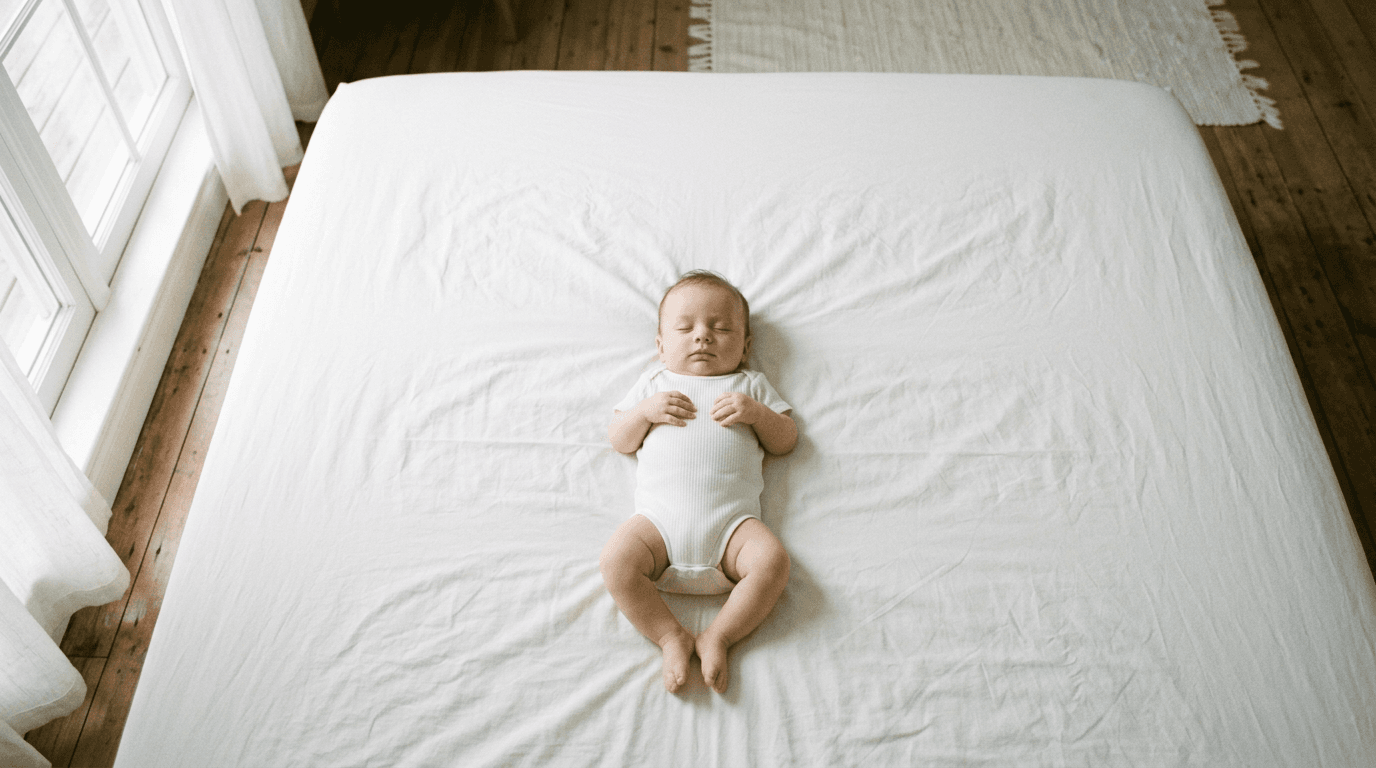
Holding an infant upright against a white wall while trying to force a neutral expression is a guaranteed way to fail a biometric scan. Most parents attempt to replicate the adult photo studio experience at home, resulting in visible hands supporting the baby, severe drop shadows, and an agitated child. Securing a compliant foto passaporto neonato is actually an exercise in horizontal photography. Infants lack the neck control required for standard portrait staging, meaning the entire setup must be moved to the floor to achieve the correct camera angle and lighting.
Quick Summary
Capturing a biometric-compliant infant passport photo requires a flat, shadow-free surface and specific lighting techniques rather than a traditional vertical backdrop. This process relies on overhead natural light, white background layers, and rapid burst photography to secure an open-eyed, neutral expression without visible parental support.
- Rely on indirect daylight to eliminate severe background shadows.
- Lay the infant flat on a rigid, white-covered surface to ensure spinal alignment.
- Ensure no adult hands, pacifiers, or supportive objects appear anywhere in the frame.
- Utilize burst mode to capture the brief moments when both eyes are open.
- Verify precise head-size proportions using compliance software before submission.
Table of Contents
- 1. Setting the stage for a foto passaporto neonato
- 2. Positioning the infant for symmetry
- 3. Capturing the biometric expression
- 4. Calibrating image dimensions and cropping
- Common Pitfalls & Troubleshooting
- FAQ
- Recommended Reads
1. Setting the stage for a foto passaporto neonato
Government photo algorithms assess contrast to locate the edges of a subject's face against the background. When an infant is seated upright, overhead lighting creates heavy drop shadows under the chin and around the ears, which biometric software interprets as structural facial anomalies, leading to immediate rejection. To avoid this, the capture environment must be moved to the floor, utilizing a horizontal plane parallel to a source of indirect natural light.

The mechanics of this setup rely on scattering the light to eliminate hard edges. Place a firm surface, such as a thick yoga mat or a piece of cardboard, near a large window during the daytime. Do not place the baby in direct beams of sunlight, as this causes overexposure on one side of the face and forces the child to squint. Instead, rely on the ambient, indirect light. Cover the firm surface with a plain, ironed white cotton bedsheet. You must iron the sheet beforehand because deep wrinkles create micro-shadows that automated verification systems frequently flag as background clutter.
The most common mistake at this stage is attempting the capture at night using standard overhead room lights. Household LED or incandescent bulbs project light from multiple points above, casting downward shadows that darken the infant's eye sockets and create a distinct black silhouette behind the head.
Practical rule: If you can see the shadow of your own hand on the background when holding the camera directly over the infant, the light source is in the wrong position and the image will be flagged.
2. Positioning the infant for symmetry
Biometric scanners map the exact geometry of the face, heavily relying on the horizontal alignment of the pupils and the vertical center line of the nose. Infants naturally curl their bodies or roll their heads to the side when placed flat, which breaks this symmetry and hides one ear from the camera lens.
To correct this without inserting your hands into the frame, use the rolled-towel technique beneath the white sheet. Tightly roll two small hand towels and place them under the fabric on either side of the baby's head to act as an invisible cradle. If the baby's chin is resting too low on their chest - creating a heavy double-chin shadow - place a very thin, folded washcloth under the sheet directly beneath the back of their neck to gently push the chin upward and level the facial plane. You can check the strictness of these alignment tolerances by reviewing German biometric photo specifications, which mandate exact centralization of the facial features.
The critical failure point in positioning is parental interference. When an infant squirms, the immediate instinct is to grab their shoulders or hold their hands down to keep them still. If a parent's fingers, a supporting arm, or even a wedding ring appears anywhere within the crop boundary of the photo, the application is automatically denied. The baby must appear entirely unsupported.
3. Capturing the biometric expression
The standard adult requirement for a completely neutral expression is slightly relaxed for newborns, but the core biometric markers must remain visible. Both eyes must be open, the mouth generally closed, and no foreign objects can obscure the face.
Mechanically, capturing this fleeting moment requires manipulating your smartphone's camera settings. Do not rely on a single shutter press. First, activate the AE/AF Lock (Auto Exposure/Auto Focus Lock) by pressing and holding on the baby's face on your screen. This prevents the camera from suddenly shifting focus to the white background if the baby wiggles. Next, hold the camera perfectly parallel to the floor, exactly over the center of the baby's face, to prevent wide-angle lens distortion that elongates the forehead or chin. Use burst mode to capture twenty to thirty frames consecutively while waving a silent visual stimulus directly next to the camera lens.
The mistake that ruins this capture is using an auditory trigger, like a squeaky toy or making a loud noise. While this gets the baby's attention, it almost always triggers a wide, open-mouthed smile or a startle reflex. Wide smiles warp the natural shape of the cheeks and eyes, causing the facial recognition software to miscalculate the distance between the pupils. For further details on expression limits, checking guidance for UK infant applications provides a strong baseline for what is deemed acceptable.
4. Calibrating image dimensions and cropping
Digital cropping tools scale the raw portrait along an invisible grid to match specific government formatting templates. The software adjusts the picture so the head occupies a precise proportion of the total image area, dominating the vertical space while leaving an exact millimeter buffer above the crown of the head and below the chin.
Whether you are verifying US passport dimensions for babies or formatting an image for a foto per permesso di soggiorno, the facial proportions must meet exact tolerances. This involves digital scaling where the final output is mapped to a grid, such as the standard 35x45mm size used across Europe. The actual sizing mechanism requires software that can accurately measure the chin-to-crown distance without degrading the image resolution below 300 DPI.
The most frequent failure in formatting occurs when parents attempt to use their smartphone's built-in background removal tools (like the iOS tap-and-lift feature) to paste the baby onto a pure white digital canvas. These consumer-grade AI tools are not calibrated for biometrics; they routinely slice off wisps of fine baby hair or parts of the ear, leaving a jagged, unnatural edge. Government verification systems easily detect these artificial cutouts and reject them for suspected digital tampering. Instead, cross-reference your unedited image against international baby passport photo requirements using a dedicated compliance platform.
Common Pitfalls & Troubleshooting
When an application is rejected, the government notice rarely explains the technical reason. These are the four most frequent failures that look similar to the naked eye but require distinct interventions.
The Gray or Blue Background Tint
- Symptom: The white cotton sheet appears muddy gray or distinctly blue in the final image.
- Diagnosis: This is the most common real cause of rejection. Your smartphone's automatic white balance overcompensated for the bright, indirect natural light coming from the window, shifting the color temperature toward the cool end of the spectrum.
- Fix: Lock your white balance manually if your camera app allows it, or use a biometric processing tool to accurately map and adjust the background threshold back to absolute white without altering the baby's skin tone.
The Asymmetrical Ear Crop
- Symptom: In the image, one of the baby's ears is clearly visible while the other is completely hidden behind the curve of their cheek.
- Diagnosis: The camera lens was not perfectly parallel to the floor. You captured the photo from a slight angle, standing near the baby's feet and tilting the phone backward.
- Fix: Stand directly over the center of the infant. The back of your smartphone must be completely flat and parallel to the ceiling. If you need help stabilizing your stance, review troubleshooting camera settings for posture tips.
The Artificial Cutout Edge
- Symptom: The infant's head has a sharp, slightly pixelated edge where it meets the white background, and the hair lacks natural fine details.
- Diagnosis: The image was captured using "Portrait Mode" or "Depth Effect," which uses software to artificially blur the background, effectively erasing the necessary natural gradient between the subject and the sheet.
- Fix: Disable Portrait Mode entirely. Shoot using the standard "Photo" setting to preserve the natural edges of the hair and ears.
The Glare Spot Rejection
- Symptom: The image is rejected for "glare on skin," but no flash was used.
- Diagnosis: The white fabric used for the background was synthetic (like polyester or satin) rather than matte cotton. Synthetic fibers bounce ambient light back onto the baby's cheeks and forehead, causing a sheen that scanners interpret as camera flash.
- Fix: Swap the background fabric for a matte, 100% cotton sheet or a large piece of non-reflective white poster board.
FAQ
What terminology should I use when printing locally, fototessera o foto tessera?
When requesting physical prints at an Italian pharmacy or photography kiosk, asking for either a fototessera o foto tessera yields the same standard 35x45mm result. However, you must explicitly instruct the clerk not to apply any auto-color corrections or "beautification" filters, as these adjustments alter natural skin tones and will invalidate a biometric photo.
To prepare for the appointment, quante foto per passaporto are required for submission?
When determining quante foto per passaporto you need to print, the standard requirement for a physical application at a consulate or local police station is two identical, printed photographs. They must be printed on high-quality photographic paper with no ink smudges. For fully digital applications, a single digital file formatted to the correct pixel dimensions is sufficient.
Can I use a pacifier to keep the baby calm during the photo?
No. Pacifiers obscure the shape of the mouth, the chin line, and the lower cheeks. Even if the pacifier is transparent, it alters the facial geometry and will trigger an automatic rejection. You must remove the pacifier just before taking the burst of photos.
Do a newborn's eyes need to be completely open?
While adult standards demand wide-open eyes, most government agencies grant leniency for infants under six months of age. Their eyes do not need to be wide open, but the pupils and irises must be visible. If the infant is fully asleep with closed eyelids, the photo cannot be used.