How to Capture a Compliant Foto Passaporto Neonato at Home
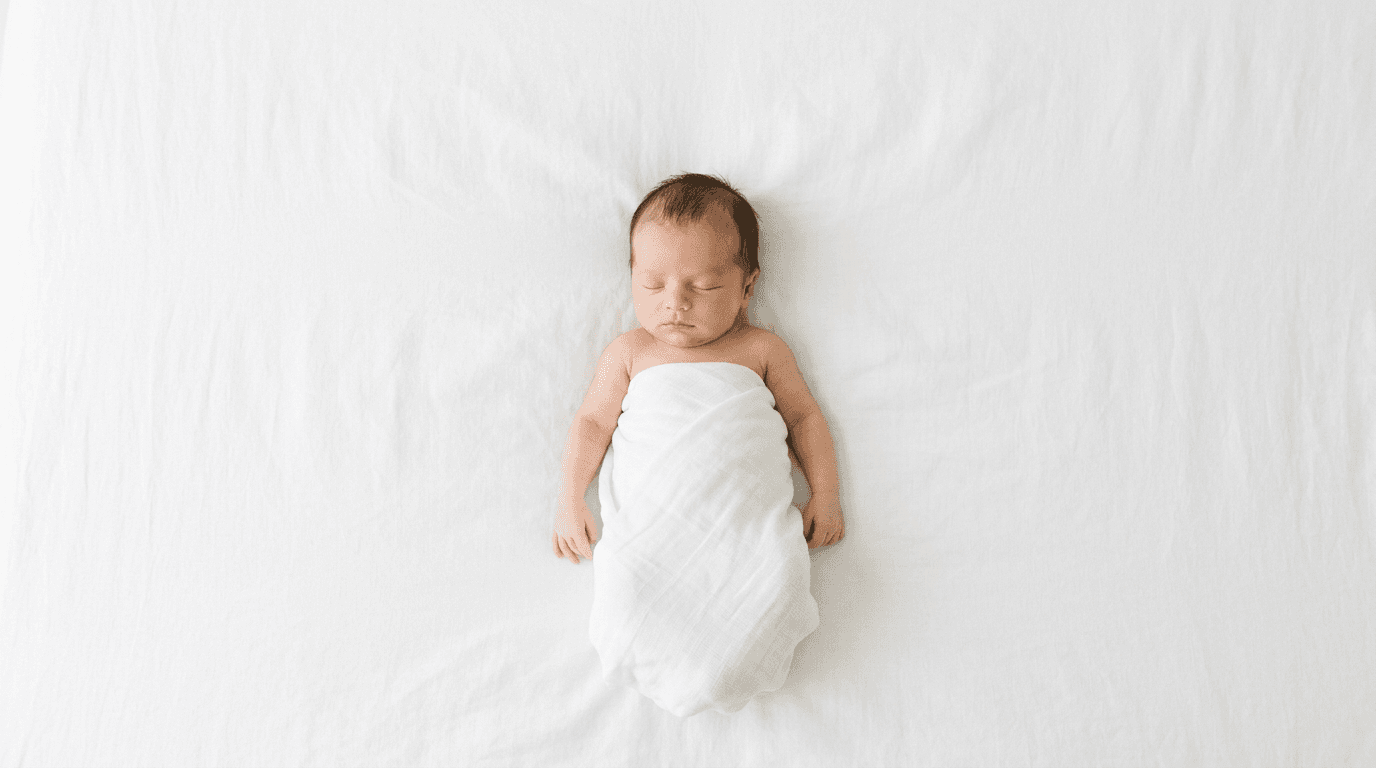
Most parents discover the impossibility of traditional document photography when a studio photographer asks their three-week-old infant to sit straight, look directly at the lens, and maintain a neutral expression. An infant lacks the cervical strength to hold their head up, making studio setups actively hostile to the biology of a newborn. Trying to prop them up introduces hands into the frame, resulting in an instant biometric rejection. Instead of forcing an infant into a commercial environment, capturing a foto passaporto neonato at home allows you to control the lighting, support the child correctly, and shoot when they are awake and alert. This guide explains how to secure a government-compliant identification image without the logistical friction of a studio visit.
Quick Summary
Capturing a compliant biometric image for an infant requires laying the baby flat, diffusing natural light, and securing a clear line of sight without visible physical support. A successful submission hinges on strict adherence to government sizing, background neutrality, and head proportion rules.
- Lay infants flat on a rigid, white surface rather than propping them up in a chair.
- Use indirect window light to eliminate facial and background shadows entirely.
- Cradle the neck with hidden towel rolls to prevent the head from tilting.
- Rely on automated biometric software to crop, center, and format the final digital file.
Table of Contents
- 1. Master the foto passaporto neonato parameters
- 2. Construct a shadow-less lighting environment
- 3. Position the infant on a horizontal plane
- 4. Elicit a neutral facial expression
- 5. Verify biometric compliance before printing
- Common Pitfalls & Troubleshooting
- FAQ
- Recommended Reads
1. Master the foto passaporto neonato parameters
What exact biometric constraints does your issuing authority require? You must understand these rules before setting up the environment. A compliant foto passaporto neonato requires precise head-to-image proportions, which vary drastically between jurisdictions. For instance, the US requires a 2x2 inch print. The head must measure between 1 and 1.375 inches from the bottom of the chin to the top of the hair. Meanwhile, European standards demand a 35x45 mm layout. This layout requires the face to cover exactly 70 to 80 percent of the vertical space. If you are preparing a family application, you must verify quante foto per passaporto you need to submit. Most governments still require two identical physical prints for paper processing. However, the digital file actually holds the biometric data during the initial scan.
The underlying mechanics of biometric scanning rely on mapping the face. They map the fixed distance between the pupils, the tip of the nose, and the bottom of the chin. When taking a foto per passaporto elettronico, the embedded document microchip will store these exact facial vectors. They verify identity at electronic border gates. The infant's head may be tilted on the Z-axis, nodding forward toward the chest. It may be tilted on the Y-axis, turning away to the side. Either tilt compresses the measurable distance between these anchor points. This causes the automated verification system at border control to fail. The geometry no longer matches a flat, forward-facing template.
The mistake most parents make here is assuming any reasonably clear photo can simply be cropped into a passport format after the fact. Cropping heavily alters the focal length and perspective of the original shot. Instead, check the exact parameters for your target country, such as the United States Baby Passport Photo Guide, to determine exactly how much negative space you must leave around the baby's head in the raw image to allow for correct algorithmic scaling later.
2. Construct a shadow-less lighting environment
Biometric algorithms automatically reject images with uneven lighting because shadows across the face obscure the structural landmarks the software maps. A shadow cast under the nose or inside the eye socket can register to a computer as a physical deformity or a scar. Similarly, a gradient shadow across the background interferes with the automated background-removal tools used by processing agencies, causing the software to blend the child's hair into the dark spots of the background.

To achieve flat, even illumination without professional strobes, position the baby parallel to a large, north-facing window during daylight hours. Direct sunlight creates harsh, high-contrast shadows; you need diffused, ambient light that wraps around the face. Place the baby on the floor so the window light washes evenly from the top of their head down toward their feet. If the light enters from the side, one hemisphere of the face will fall into heavy shadow, rendering the eye on that side unreadable to a scanner.
The mistake parents routinely make is turning on overhead room lights to supplement a dim window. Incandescent or LED ceiling lights cast a secondary yellow hue and create sharp downward shadows under the eyes and chin, severely confusing the camera's white balance. If the natural light is too weak, move closer to the window, but never mix natural light with artificial room lighting.
Practical rule: If you hold your hand six inches above the background and see a distinct, hard-edged shadow beneath it, the light is too direct and will cause a biometric rejection.
For parents debating their foto per passaporto dove farle, the floor directly adjacent to a large glass sliding door is consistently the most reliable, evenly lit environment in any residential home.
3. Position the infant on a horizontal plane
Newborns lack the cervical musculature to sit vertically, meaning any attempt to photograph them in a traditional chair requires parental hands in the frame to hold them up. Government guidelines strictly forbid any visible support, including fingers, pacifiers, car seat straps, or the edge of a parent's shirt. The only viable mechanical solution is to shoot from directly above while the child lies perfectly flat on their back.
You must create a firm, horizontal staging area. Spread a bright white, untextured blanket or a high-quality paper sheet over a rigid surface. Use a foam floor mat or a firm bed. The surface must be hard enough that the infant does not sink into it. Deep wrinkles or fabric pooling around the ears will trigger a background rejection. In these cases, the edge of the head becomes indistinguishable from the cloth. You must stabilize the head without using your hands. Roll two small washcloths into tight cylinders. Slide them completely out of sight under the blanket. They must form a subtle U-shape that cradles the back of the baby's neck. This prevents the head from lolling to either side when they relax.
The primary failure mode here is the camera angle. Parents naturally stand over the baby and angle the smartphone lens slightly downward toward the chest to get a better view of the face. This angle induces severe perspective distortion, making the forehead look disproportionately large while shrinking the chin. The camera sensor must remain perfectly parallel to the floor, positioned directly over the infant's nose. If you are applying for dual citizenship, ensure this horizontal framing meets both sets of regulations, referencing specifications like the Australia Baby Passport Photo Guide to confirm acceptable negative space around the shoulders.
4. Elicit a neutral facial expression
While immigration authorities offer slight leniency for infants regarding open mouths or partially closed eyes, a neutral expression remains the baseline requirement for biometric verification. The software must identify the precise geometric distance from the center of the closed lips to the tip of the nose. Crying, smiling, or yawning aggressively distorts this geometry, stretching the facial vectors beyond recognizable limits and pushing the cheeks up over the eyes.
The mechanics of capturing a neutral face rely heavily on timing and auditory distraction rather than visual commands. A newborn cannot follow a pointing finger or track a toy reliably. To force the eyes open and direct their gaze toward the lens, position your smartphone perfectly still, then make a sudden, unfamiliar clicking noise with your tongue directly behind the camera. The auditory reflex will cause the infant to widen their eyes and stare toward the sound's origin for approximately two to three seconds, giving you a brief window of perfect neutrality.
The critical error parents make is shooting continuously in burst mode while actively waving loud toys or calling the baby's name. This results in motion blur and causes the child's eyes to track the moving object entirely off-camera. The result is a rejected image where the subject is looking away from the lens. You must wait for the child to settle, pre-focus the lens by tapping their face on your screen, and take a single, deliberate exposure only when they achieve a resting state. For jurisdictions with extremely stringent facial posture rules, such as those detailed in the Germany Baby Passport Photo Guide, this momentary direct eye contact is the difference between acceptance and a delayed passport.
5. Verify biometric compliance before printing
A perfectly lit and positioned photograph still requires rigorous digital formatting before it can be submitted to a government agency. Raw smartphone images contain far too much background and are captured in entirely the wrong aspect ratio (usually 4:3 or 16:9). You must crop the digital image so the head covers the exact percentage of the frame dictated by the destination country's regulations, perfectly centered both vertically and horizontally.
This formatting process involves mapping the digital file against a strict biometric template. You cannot simply use the default pinch-to-crop tool on a smartphone, as human hands lack the millimeter precision required to measure head height against the total canvas size. Specialized automated software handles this by mapping the facial landmarks, stripping away any lingering background shadows, and generating a pure white or light grey canvas behind the child. It then outputs a file sized precisely for the application portal or as a multi-photo template ready for a commercial photo printer.
The most common mistake at this stage is attempting to manually remove the background using general-purpose photo editing apps or native smartphone cutout tools. These generic tools often clip the fine hairs around the baby's head, soften the jawline artificially, or leave digital artifacts along the ears. Immigration software detects these manual alterations as image tampering, resulting in an immediate security rejection. Instead, rely on dedicated compliance engines that understand specific consular rules. If you are preparing documents for North America, review the Canada Baby Passport Photo Guide to see how algorithmic checks enforce strict 50x70 mm dimensional limits, while Asian consular requirements, outlined in the Singapore Baby Passport Photo Guide, demand different facial scaling and finish textures.
Common Pitfalls & Troubleshooting
Even when following the correct protocol, minor environmental factors can render an image non-compliant. These failures often look similar at a glance but require entirely different interventions to resolve.
The background appears muddy or grey
- Symptom: The white sheet beneath the baby looks dull, off-white, or heavily textured in the final photo, despite being pure white in person.
- Cause: This is the most frequent cause of rejection. It occurs because the camera's auto-exposure algorithm sees a massive expanse of white and darkens the entire image to compensate, assuming the bright scene is overexposed.
- Fix: Tap on the baby's face on your smartphone screen to lock the focus and exposure, then manually drag the exposure slider up slightly to brighten the background without blowing out the highlights on the child's skin.
Perspective distortion enlarges the forehead
- Symptom: The infant's forehead appears massive, while the chin and shoulders look unusually small and recede into the background.
- Cause: The smartphone lens is too close to the subject and angled downward, rather than being perfectly parallel. Wide-angle smartphone lenses heavily distort subjects placed closer than two feet.
- Fix: Move the camera at least three feet above the infant, ensure the back of the phone is exactly parallel to the floor, and use the device's optical zoom (typically 2x or 3x) to frame the head and shoulders tightly without getting physically closer.
Unwanted skin reflections and glare
- Symptom: Bright, clipped white spots appear on the infant's cheeks, forehead, or nose.
- Cause: Using the camera's built-in flash, or positioning the infant directly in a shaft of hard sunlight. Biometric scanners flag these high-contrast hotspots as obscured facial features.
- Fix: Disable the camera flash permanently. If shooting near a window, pull a sheer white curtain across the glass to scatter and diffuse the incoming light, eliminating the hard reflections on the skin.
Asymmetrical shadow masking
- Symptom: One side of the baby's face is visibly darker than the other, particularly around the jawline and eye socket.
- Cause: Directional light hitting the subject from the side rather than washing over them from the top down.
- Fix: Rotate the baby 90 degrees so the crown of their head points directly at the primary light source (the window). The light will now travel evenly down the bridge of the nose, casting symmetrical shadows under the chin that do not trigger biometric flags.
FAQ
Do both eyes need to be completely open for a newborn passport photo?
Most national passport agencies allow slight exemptions for infants under 12 months. While closed eyes are generally unacceptable, partially open or sleepy eyes are often permitted for newborns who cannot maintain an alert state. However, the pupils must remain visible to allow the software to calculate interpupillary distance. If the eyes are completely shut, you must wait until the infant wakes.
Can the baby wear a headband, bow, or pacifier?
No. Biometric standards prohibit any accessories that obscure the face, jawline, or hairline. Headbands, bows, hats, and pacifiers will result in an immediate rejection. The infant should wear simple, everyday clothing that contrasts slightly with the white background, and their entire head from the chin to the top of the scalp must be completely unhindered.
What happens if my hands are visible holding the baby?
Visible hands, fingers, or even the edge of a parent's sleeve are grounds for automatic failure in every jurisdiction. The photo must portray the child as an isolated subject. This is why laying the infant flat on their back and supporting their head with hidden towels underneath the background fabric is the only reliable method for home photography.
How do I print the digital file at the correct physical dimensions?
Do not print the image directly onto a single sheet of standard A4 paper. You must assemble the compliant digital file onto a standard 4x6 inch (10x15 cm) digital photo template. Once generated, this template can be printed at any retail pharmacy or photo kiosk. The template ensures that when the individual passport photos are cut out, they retain the exact millimeter dimensions required by the government.