10 Passaggi per Creare Foto Passaporto Professionali
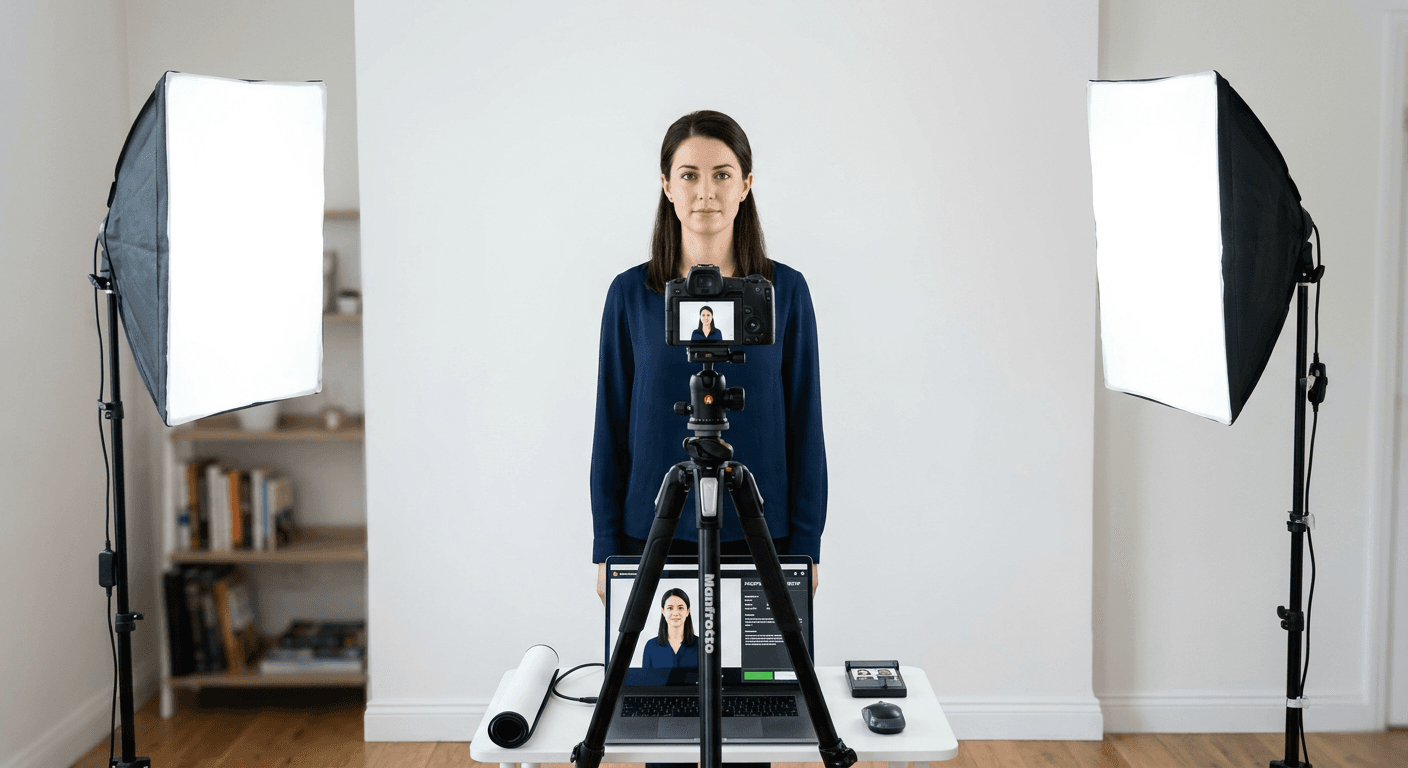
Creating professional-grade identification images at home is an achievable task when you understand the specific technical requirements mandated by passport authorities. Learning come fare foto passaporto effectively ensures that your application is not delayed due to non-compliant documentation. By leveraging proper lighting, standardized dimensions, and correct camera positioning, you can produce a high-quality foto digitale formato tessera that meets strict international biometric standards.
Quick Summary {#quick-summary}
Learning how to create a compliant passport photo involves capturing a high-resolution, front-facing image against a plain background with neutral lighting and specific dimensions. Adherence to strict biometric guidelines is essential for government approval.
- Use a plain, off-white or light-colored background.
- Ensure even, shadow-free lighting on the face.
- Maintain a neutral expression with eyes fully visible.
- Adhere to specific pixel or inch requirements for your region.
Table of Contents {#table-of-contents}
- Quick Summary
- Preparing Your Environment and Equipment
- Capturing the Perfect Biometric Image
- Formatting Your Digital Passport Photo
- Common Pitfalls and Troubleshooting
- Frequently Asked Questions
- Recommended Reads

Preparing Your Environment and Equipment {#preparing-your-environment-and-equipment}
Before you begin the process of come fare una foto formato tessera, you must establish a suitable environment. The most common cause of rejection for home-made photos is inadequate background or poor lighting. Choose a location in your home that offers a solid, light-colored wall, preferably white or off-white, free of patterns, textures, or shadows. If a plain wall is not available, hanging a wrinkle-free light sheet can serve as a suitable backdrop.
Lighting is equally critical when you creare foto tessera. Avoid using your camera's built-in flash, as it often creates harsh reflections on the skin and distracting shadows behind your head. Instead, position yourself facing a window during daylight hours to utilize soft, diffused natural light. If natural light is unavailable, two lamps placed at 45-degree angles in front of your face will help eliminate shadows on either side of the nose or under the chin. You can find detailed instructions on positioning and setup in our comprehensive passport guide.
Capturing the Perfect Biometric Image {#capturing-the-perfect-biometric-image}
When photographing yourself or someone else, the camera must be placed at eye level. If you are using a tripod, ensure the lens is directly perpendicular to the subject. For handheld shots, have another person stand at a distance of about 1.5 to 2 meters to avoid facial distortion caused by wide-angle lens settings. The subject should face the camera directly, with shoulders squared and both ears visible, if possible, depending on specific country requirements such as those outlined for a US baby passport photo.
Maintain a neutral expression, keeping the mouth closed and eyes wide open. Glasses are generally discouraged due to potential glare on the lenses, which can obscure the eyes and result in immediate rejection. Ensure that hair does not obstruct the facial features or eyebrows. Once you have captured several high-resolution shots, review them carefully for any sign of motion blur. It is often helpful to use the online help section to verify specific local requirements before finalizing your image selection.
Formatting Your Digital Passport Photo {#formatting-your-digital-passport-photo}
Whether you are asking about fototessera o foto tessera, the digital file must be processed according to the specific sizing requirements of the issuing agency. Most agencies require a specific aspect ratio, typically 35mm x 45mm or 2x2 inches. When cropping your image, ensure the head is centered and occupies a significant portion of the frame, usually between 70% and 80% of the total height.
Professional photo editing software or specialized online tools can help you resize and align the head according to biometric templates. Always save your file in a high-quality JPEG format without excessive compression, as clarity is paramount for facial recognition systems. If you encounter difficulty during this step, you can reach out via our contact page for guidance on common formatting issues. Remember that once the image is cropped, you should not apply any filters or digital enhancements, as these can alter your biometric identity.
Pro Tip: Always capture photos in the highest resolution your camera or smartphone supports. It is significantly easier to scale down a high-quality image than it is to fix a pixelated, low-resolution shot.
Common Pitfalls and Troubleshooting {#common-pitfalls-and-troubleshooting}
One of the most frequent mistakes is failing to account for head tilt. Even a slight angle can lead to the rejection of a digital passport photo. Always use a spirit level or a digital grid overlay on your camera viewfinder to ensure the subject’s eyes are perfectly horizontal. Another common issue is the presence of jewelry or clothing that causes shadows or glare. Remove bulky necklaces, earrings, or large headbands before the shoot to ensure a clean, professional result.
Check for background consistency after the photo is taken. Sometimes, uneven lighting makes a white wall appear grey or yellow, which can violate agency standards. If the background color is inconsistent, use an image editor to adjust the exposure and saturation levels of the background specifically. If you remain unsure about your results, check our about section for a list of professional tips and standard requirements that might apply to your specific travel document.
Frequently Asked Questions {#frequently-asked-questions}
Can I wear glasses in my passport photo?
Most countries now prohibit glasses in passport photos to avoid glare and reflections that hide the eyes, which are essential for biometric identification.
What is the ideal distance for taking a passport photo?
Stand approximately 1.5 to 2 meters away from the camera. This distance helps prevent the "fish-eye" effect that can distort facial features if the camera is too close.
Can I use a selfie for a passport photo?
Selfies are generally discouraged because they are often taken from a non-neutral angle, creating distortion. It is better to have someone else take the photo or use a tripod with a timer.
How do I ensure my background is acceptable?
Use a flat, matte-finish wall. If you are using digital editing to replace a background, be extremely careful to avoid halos around the hair or edges, as these are easy triggers for automated system rejection.