5 Steps to Mastering the foto per permesso di soggiorno for Families
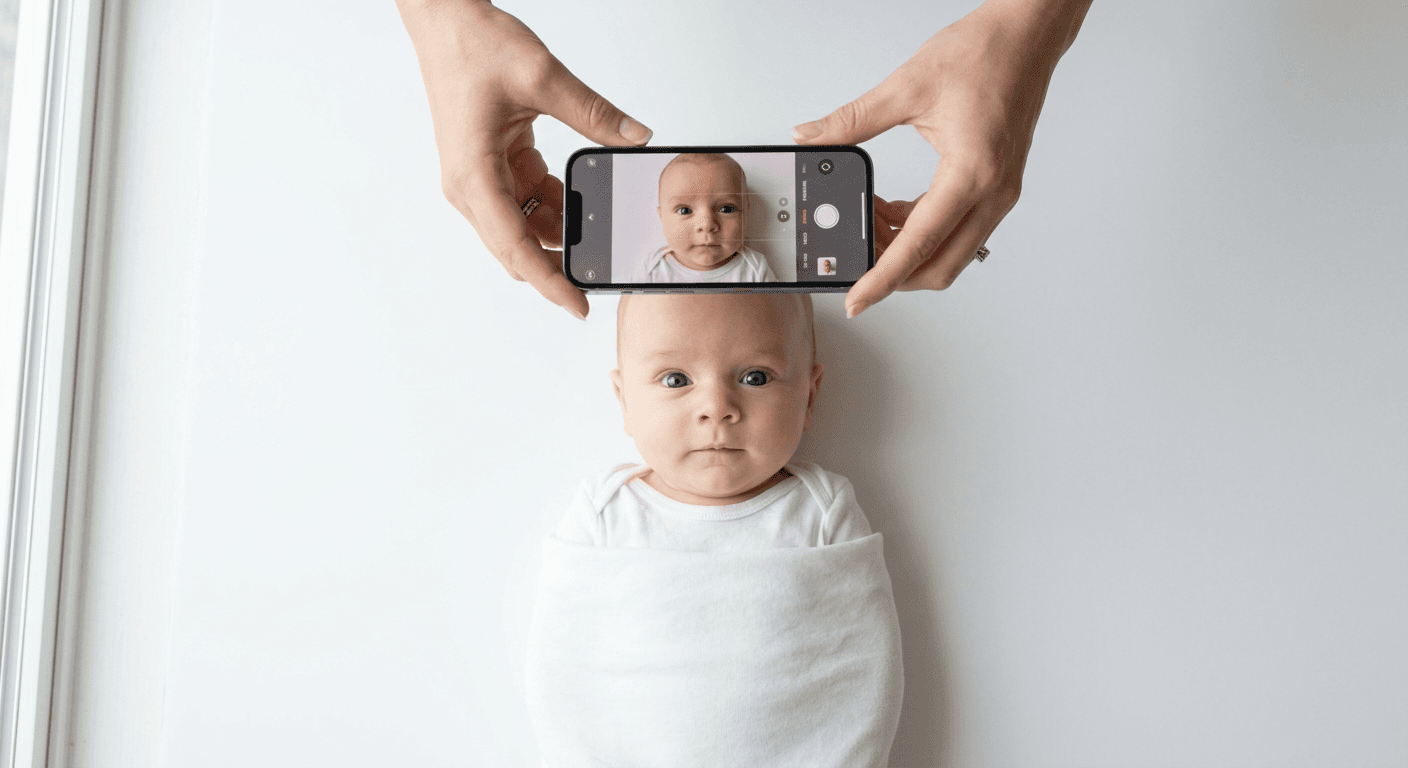
You slide the application folder across the desk at the local Questura, only for the officer to tap the photo of your infant and shake their head. The lighting is slightly uneven, or the head is a fraction of a millimeter too small in the frame, and your appointment is abruptly over. A failed foto per permesso di soggiorno is never just a request for a new picture; it is a trigger for rescheduled appointments, extended waits, and bureaucratic friction. The Italian authorities enforce strict biometric standards based on international aviation specifications, and software, not a human, performs the final verification. This guide breaks down exactly how to capture, format, and prepare an infant’s photo so it passes the electronic scanners on the first attempt.
Quick Summary
The Italian residence permit requires a biometric photo that strictly adheres to ICAO 9303 standards, emphasizing uniform lighting, strict sizing, and a clear view of the facial geometry. Infant photos are particularly difficult because they must meet the same structural criteria as adult photos without the benefit of a cooperative subject.
- The photo must measure exactly 35x45 mm, with the head taking up 70-80% of the vertical space.
- The background must be uniformly white, with absolutely no shadows behind the head or neck.
- Both eyes must be open, looking directly at the lens, and the mouth must be closed.
- Supporting hands, pacifiers, or toys cannot be visible in the frame.
- Prints must be on high-quality photographic paper, ideally produced via dye-sublimation to prevent pixelation.
Table of Contents
- 1. Calibrating the Background and Lighting for Italian Standards
- 2. Positioning Infants and Toddlers for Biometric Compliance
- 3. Managing Expressions and Eye Visibility
- 4. Formatting and Sizing the Digital and Printed Image
- 5. Executing the Final Compliance Check Before the Appointment
- Common Pitfalls & Troubleshooting
- FAQ
- Recommended Reads
1. Calibrating the Background and Lighting for Italian Standards
Italian immigration authorities use software to isolate the applicant's head from the background. For this algorithm to work, the contrast between the subject and the space behind them must be distinct and uniform. You cannot use a wall that is cream, eggshell, or light gray. The requirement is plain white.
Why the Questura Rejects Off-White Backgrounds
The digital scanners measure the edges of the jawline and the crown of the head. If the background color bleeds into the skin tones due to poor lighting, or if shadows drop behind the ears, the software cannot draw a distinct boundary. When this isolation fails, the system throws an error, and the officer must reject the application.
With infants, parents frequently lay the baby on a white bedsheet. The mistake here is texture. A wrinkled sheet creates micro-shadows that the scanning software interprets as background noise. Pull the fabric completely taut, or better yet, use a large sheet of smooth white poster board. Position the baby near a large window to use diffused, indirect sunlight. Direct sunlight casts harsh shadows under the nose and chin, which alters the measurable distances of the facial features.
2. Positioning Infants and Toddlers for Biometric Compliance
Unlike adult applicants who can stand perfectly straight at a specified distance, infants lack the motor control to hold a pose. Yet, the biometric requirements do not relax for age. The head must be centered, the camera must be exactly at eye level, and the face must address the lens squarely, without tilting up, down, or to either side.
The Mechanics of Facial Geometry
The core of the biometric check is the interpupillary distance (the space between the centers of the eyes) and the vertical distance from the chin to the crown. If the camera is angled down at the baby rather than being perfectly parallel to the face, it distorts the jawline, elongating the forehead and shrinking the chin. This perspective distortion guarantees a rejection.
Practical rule: Hold your smartphone perfectly parallel to the baby's face, ensuring the phone's back is not tilted forward or backward, and keep the lens at least 40 centimeters (about 16 inches) away to prevent barrel distortion from the camera's wide-angle lens.
Parents often try to hold the baby sitting up. This almost always results in a parent's hands, arms, or clothing appearing in the frame, which immediately invalidates the image. Laying the infant on their back is the standard workaround, but babies often tilt their chins down toward their chests in this position, obscuring the neck. Place a tightly rolled towel strictly beneath their neck - hidden completely from the camera's view - to gently lift the chin and expose the jawline.
3. Managing Expressions and Eye Visibility
The requirement for a neutral expression exists because strong facial movements alter the topology of the face. Smiling raises the cheeks and narrows the eyes, which changes the measurable distances between facial landmarks. For a residence permit, the applicant's mouth must be entirely closed, and the eyes must be fully open and visible.
Catchlights and the Neutral Face Mandate
Infants are notorious for sleeping, crying, or holding their mouths open. You must catch a moment of quiet alertness. The eyes must not only be open, but the irises and pupils must be clearly visible. A prominent failure mode occurs when a camera flash causes the baby to squint or triggers the "red-eye" effect. Flash photography also risks washing out pale skin against a white background, removing the vital contrast the scanner needs.
Never attempt to correct red-eye or closed eyes using photo editing software. Biometric scanners detect digital manipulation by analyzing pixel clusters, and manipulated photos are classified as fraudulent. Wait for the baby to wake up naturally, use a toy held directly behind the camera lens to draw their gaze, and shoot in burst mode to capture the split second the mouth closes. Ensure there are no pacifiers, food residue, or drool on the face, as the software interprets these as anomalies on the skin surface.
4. Formatting and Sizing the Digital and Printed Image
Capturing the correct image is only the first half of the process; formatting it to Italian legal specifications is where many applicants fail. The image must be cropped to exactly 35 millimeters in width and 45 millimeters in height. Within that frame, the distance from the tip of the chin to the top of the head (excluding hair) must measure strictly between 32 and 36 millimeters.
The 35x45mm Specification Explained
If the head is too small, the software lacks the resolution to map the eyes and nose. If the head is too large, there is insufficient background space to verify the outline of the head. When submitting the same image as a foto per carta d'identità elettronica, you must ensure these dimensions are identical, as both the ID card and the residence permit rely on the same ICAO 9303 framework.
Do not rely on the default aspect ratios of a smartphone camera (usually 4:3 or 16:9). The image must be cropped specifically to the 35x45 aspect ratio before printing. Leaving too much space above the head is the most frequent formatting error. The gap between the top of the head and the upper edge of the photo should be approximately 2 to 3 millimeters - enough to show the crown clearly, but no more. If you are comparing global baby photo requirements, you will notice that this tight cropping is standard across the European Union, whereas requirements in the United States ask for entirely different head-to-image ratios.
5. Executing the Final Compliance Check Before the Appointment
Once the photo is captured and formatted, the physical print must maintain the integrity of the digital file. The Questura requires physical photographs that will be digitally scanned back into their system. This means the print quality dictates the success of the biometric scan.
Verifying the Print Resolution and Contrast
Photos must be printed at a minimum resolution of 600 DPI (dots per inch). Using a standard home inkjet printer on regular A4 paper is an automatic failure. Standard paper bleeds ink, which destroys the sharp edges of the facial features required by the scanner.
Photographs must be printed on high-quality photographic paper. While both matte and glossy papers are generally accepted, high-gloss paper printed via dye-sublimation is superior because it prevents the micro-pixelation that occurs with ink droplets. However, glossy paper can create glare when placed under the Questura's desktop scanner. If you use glossy paper, ensure there are absolutely no smudges, fingerprints, or scratches on the surface before handing it over. Do not staple the photo to any forms; the staple holes disrupt the biometric scan and will ruin the image.
Common Pitfalls & Troubleshooting
Four distinct errors account for the vast majority of rejected biometric photos at the Questura. From the outside, a "bad photo" just looks like a bad photo, but the scanner fails for highly specific, mechanical reasons.
1. Shadows Misinterpreted as Facial Features Symptom: The photo is rejected for "unclear facial boundaries" even though the background looks mostly white. The real cause: A single light source (like a window on only one side of the room) casts a shadow on the opposite side of the baby's nose and neck. The software reads this shadow as part of the face, widening the recorded jawline. The fix: You need balanced light. Place the baby facing the window directly, rather than having the window to their left or right. If that is impossible, use a white piece of cardboard on the shadowed side of the baby to bounce the window light back onto their face.
2. Aspect Ratio Distortion (The "Squeezed" Face) Symptom: The baby's face looks slightly thinner or longer in the print than in real life, resulting in a geometry failure. The real cause: Taking a standard 4:3 smartphone photo and forcing it into a 35x45mm print template without cropping properly. The printer software compresses the image to make it fit, altering the interpupillary distance. The fix: Always crop the original digital file to the exact 35x45mm aspect ratio before placing it onto a print sheet. Never use a "fit to page" or "stretch to fit" printer setting.
3. Support Items in the Frame Symptom: Immediate rejection by the desk officer before scanning. The real cause: The edge of a parent's thumb, a piece of a car seat strap, or a pacifier clip is visible at the very bottom edge of the photo. The fix: If you must use a car seat to hold a newborn upright, drape a heavy, flat white cloth completely over the seat, tucking it tightly so no straps or edges remain visible. Keep your hands entirely out of the frame.
4. Contrast Washout from Flash Symptom: The skin tones blend into the white background, and the eyebrows are barely visible. The real cause: Firing a smartphone flash too close to the subject. The intense burst of light blows out the highlights on pale skin, removing the contrast the software uses to locate the edge of the face. The fix: Turn off the flash entirely. Rely strictly on ambient daylight. If the room is too dark, move to a different room or wait for a brighter time of day.
FAQ
Can I use my smartphone to take the photo? Yes. Modern smartphone cameras have sensors capable of exceeding the 600 DPI requirement. The challenge is not the camera quality, but rather controlling the lighting, distance, and final cropping. Ensure the phone is held at least 40cm away to avoid lens distortion.
Do newborns need to have their eyes open? Yes. The Italian biometric requirements (based on ICAO rules) mandate open eyes for all applicants, regardless of age. There is no official exemption for sleeping newborns, and closed eyes will result in a rejected application.
Are babies allowed to wear glasses in the photo? Unless the glasses are medically required and worn permanently, they should be removed. If they must be worn, the frames cannot cover any part of the eyes, and there can be absolutely no glare on the lenses.
Does the baby's ears need to be visible? It is highly recommended. While hair can cover the ears, pulling the hair back to reveal the ears helps the scanning software define the width of the face more accurately and prevents shadows that might otherwise cause a rejection.